Creating a delayed auto-attendant
Often used as a backup or fail-over if your receptionist doesn't answer the phone within a few rings. It's a perfect mix between human answering and system support.
What are the benefits of a delayed auto attendant?
If you want your front desk to answer the phones. This could be a great option for you. It's ideal if you have one staff member covering the front desk. What happens when they are sick, or filling the coffee pots, or in the back, or speaking with a visitor to your office? Instead of pressuring them to answer the phone and place the caller on-hold, this system removes that pressure and gives callers the direction they need.
Creating a delayed auto-attendant
Step 1. Log into your manager portal and Create an auto-attendant or use one you already have.
Step 2. Select the users tab at the top navigation bar.
Step 3. Select "Add Ring Group' button on the right side of your screen.

Step 4: Name your ring group something like 'Reception' or 'Front Desk'
Step 5. Use a unique 3 digit extension number. We recommend the 600 bank.
Step 6. Add your receptionist extension into the ring group.
Step 7. Use the + Icon to add as many others as you wish to ring.
Step 8. Change the Ring Timeout to 10 seconds or 15 seconds.
Step 9. When unanswered - Send callers to the 'auto attendant' of your choosing.
Step 10. Select Add Group.

Call Flow Explained
The users you included in this ring group will receive the calls for 10-15 seconds which is between 3-4 rings. You don't want to use any clock delays for the users as it's a short period of time. After the ring timeout, callers will be sent to your auto-attendant.
Now that you created the ring group, let's send callers there.
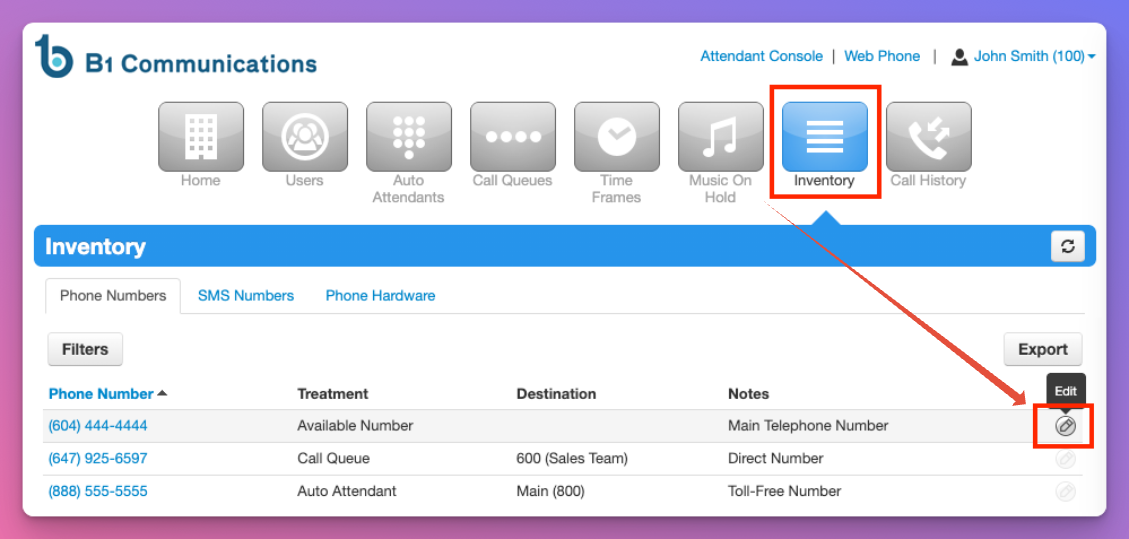
Step 11. Select the 'Inventory' tab on the top menu.
Step 12. Select the edit icon on the far right side of the number you wish to modify.
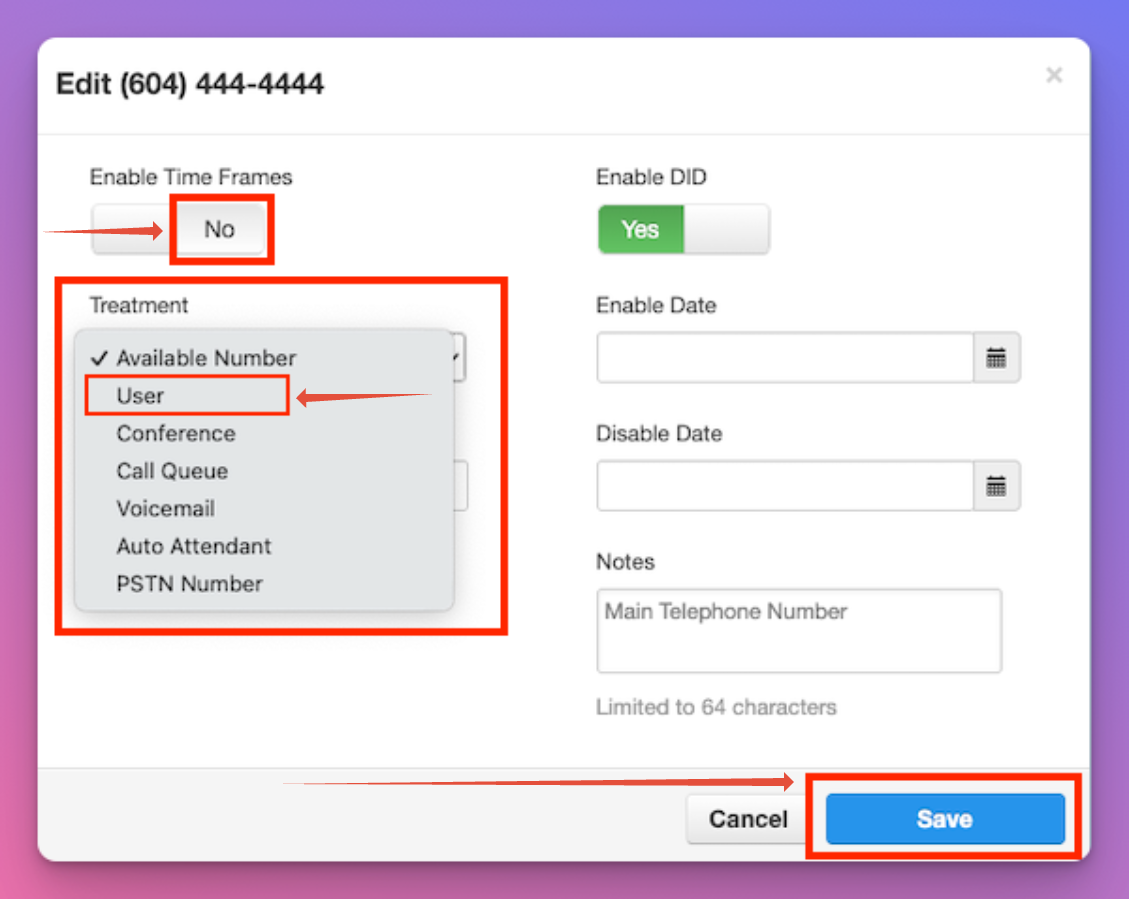
Not Using Timeframes or Schedules
Step 13. If you want this to be active at all times, ensure 'Timeframe' is turned off.
Step 14. Select treatment and 'User"
Step 15. Type in the ring group that you created.
Step 16. Select Save.
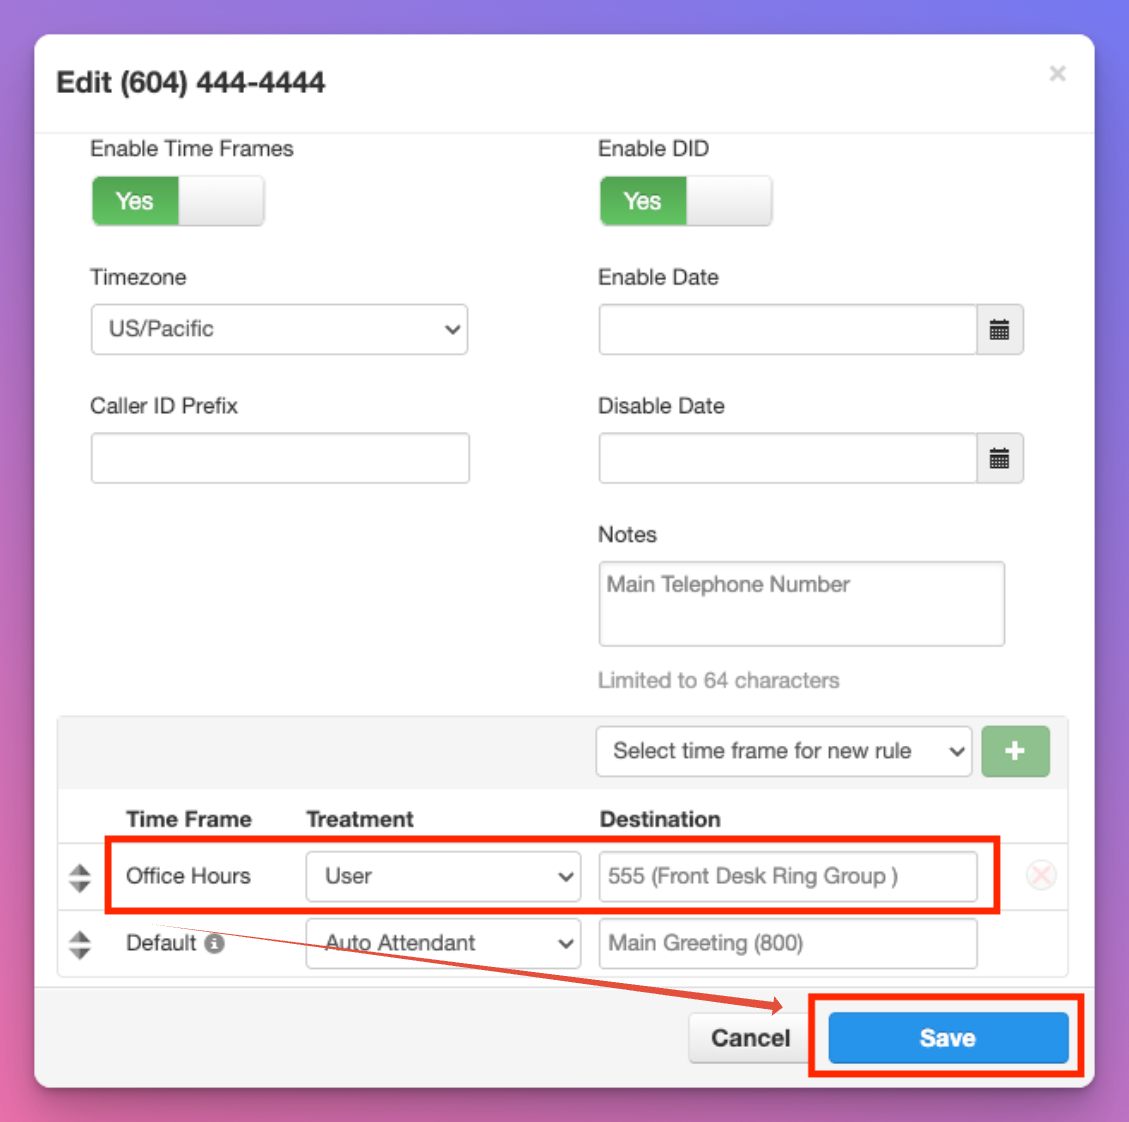
Using Timeframes or Schedules
Step 17. If you need to create timeframes for your business
Step 18. Located the timeframe you wish to adjust. In this example, we are adjusting 'Office Hours.'
Step 19. Treatment should be 'User' and type in the name of your ring group.
Step 20. Select save.